Cervico by VPI General Information and Instructions of use
The product is available in 3 different versions which are encoded as :
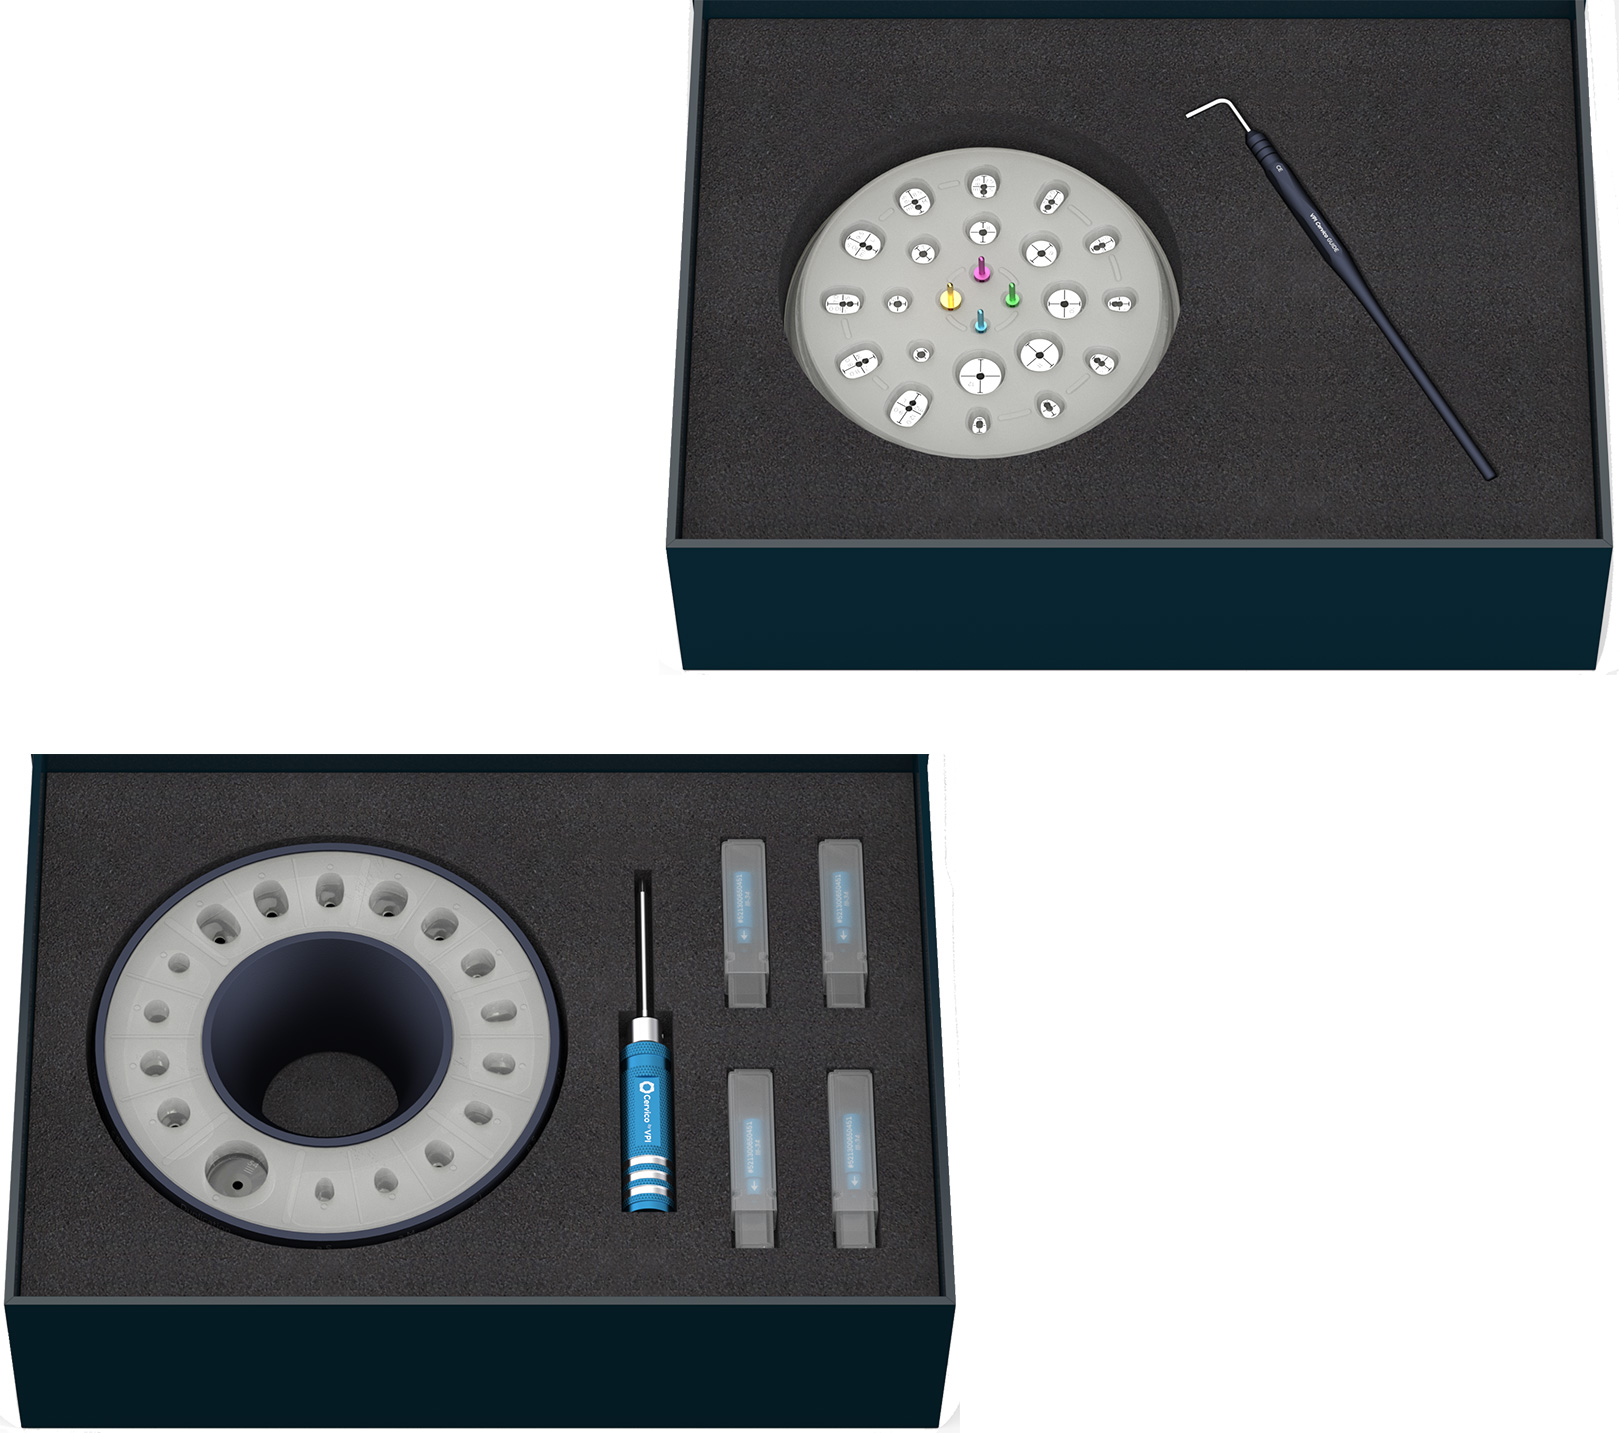
Cervico Premium Mold (Item No #5213006650000) includes only the Alum mold and Silicone insert plus an allen head screwdriver which is used for parts replacement when necessary.
Cervico Guide (Item No #5213006650017) includes only the guide and its components (1 silicone autoclavable guide tray, 20 tabs, 1 guide retention handle, 4 Guide pins).
Cervico Premium kit (Item No #5213006650024) includes both the guide and the mold with their aforementioned components.
Use The guide of the system (Cervico Guide) is used for the intraoral and / or extraoral evaluation of a patient’s edentulous space in order to choose the appropriate size and shape cervico healing abutment and duplicate impression post to be manufactured from the mold of the system, as they relate to the cervical margin of the desired implant prosthesis. In addition, the tabs of the guide and / or the pins of the guide, individually or in combination, may be used during the osteotomy preparation in the patient’s jaw for the purpose of marking the correct position of the osteotomy and controlling the inclination of the latter during the steps of bone drilling. All functional parts of the guide can be re-used after proper disinfection and sterilization process following the same standards as for sterilization process of reusable dental tools.
The mold of the system (Cervico Mold) is used for the manufacturing of the cervico healing abutments and duplicate impression posts, that resemble the cervical profile of the desired implant prosthesis. All functional parts of the mold (base, silicone insert) can be re-used after proper disinfection and a sterilization process following the same standards as for sterilization process of reusable dental tools.
Each of the tabs of the guide has a shape and dimensions that are the same to the cervical portion of a corresponding well of the mold that carries the same coding as the one of the tab to which it corresponds. E.g. If the tab (pS) of the guide has been chosen as the one representing best the cervical profile of an implant site, then the (pS) well of the mold must be used in order to produce the custom healing abutment and it’s duplicate impression post to be utilised for this case.
The Cervico System allows the clinician to identify the optimum cervical profile to be generated and subsequently fabricate the optimum shape and size healing abutment and duplicate impression post for the accurate generation and recording of the selected cervical profile.
Step 1
Evaluate the edentulous space dimensions with the cylindrical tab. This will allow you to confirm that there is enough space to place an implant.
Step 2
Evaluate the proper cervical profile shape and dimensions with the corresponding group anatomical tab.
Step 3
Utilize the cylindrical tab, attached to the handle in order to mark the proper entry site for the osteotomy.
Step 4
Utilize the Cervico Guide pins during the osteotomy preparations to confirm proper osteotomy position and angulation in relation to the desired cervical profile.
Step 5
Couple thread the temporary core abutment in the corresponding well of the mold applying hand torque only.
Step 6
Fill in the open space with VPI composite material and light cure for 40 sec. Following, remove the cervico healing abutment from the mold and light cure for additional 20 sec to ensure complete curing.
Step 7
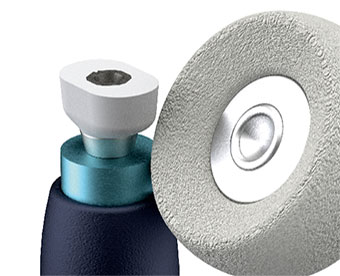
Couple thread the cervico healing abutment to the easy grip polishing handle and polish the composite surface with polishing paste and the brushes provided.
Step 8
Follow the same steps as per steps 5, 6, 7 for the fabrication of the duplicate custom impression post by utilising a stock impression post as a core.
Step 9
Couple the cervico healing abutment with the implant at time of implant placement or at uncovery. Allow sufficient healing time.
Step 10
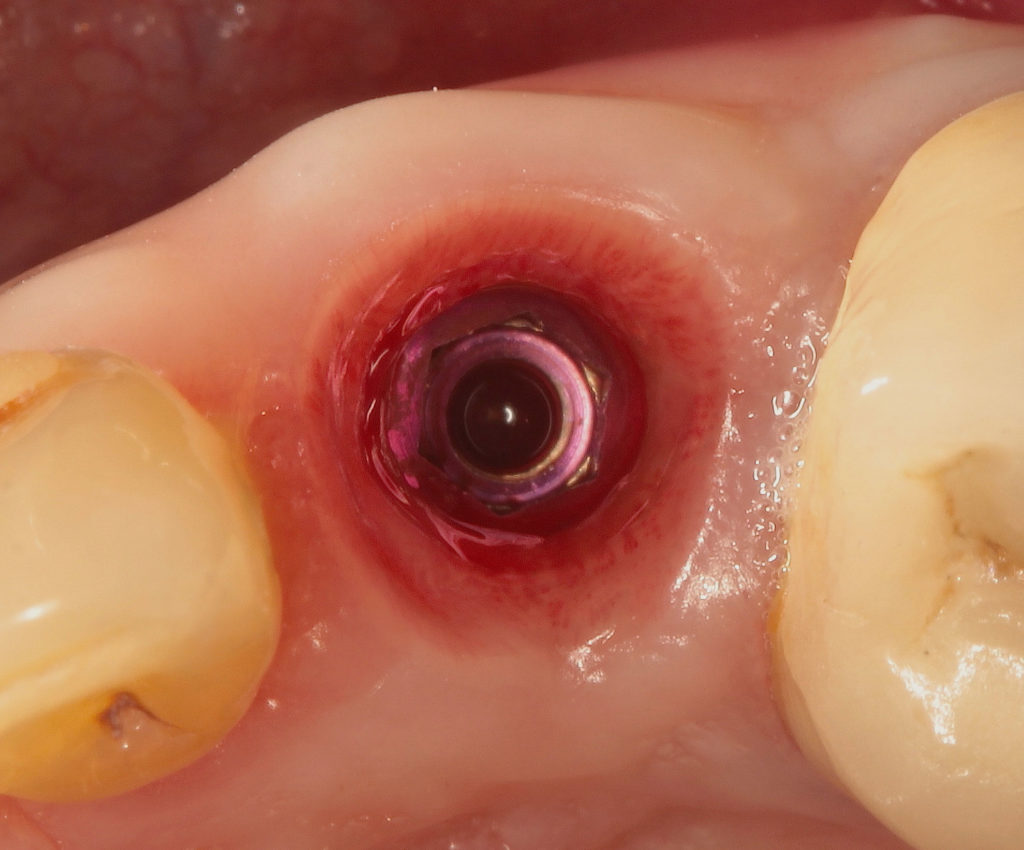
Uncouple the healing abutment and reveal the generated natural soft tissue profile.
Step 11
Couple thread the custom impression post with the same orientation and following, take an implant impression.
Step 12
Generated soft tissue profile accurately transferred to the working cast.